MIYOO MINI PLUS Ultimate Setup Guide - OnionOS, Roms, Box Art And Tweaks

Content taken by Joey's Retro Handhelds
Hey, everyone!
I'm Joey and today. I've created the ultimate setup guide for your Miyoo Mini Plus like my previous setup guides. Everything will be time stamped, so feel free to jump around to the spots you need. However, if this is a brand new device to you, I'd suggest starting from the beginning as you might miss something. As you've likely guessed from the video title, we're going to be installing onion OS as our operating system if you're looking to stay with the stock operating system.
This guide won't be for you, so why onion OS well it's the best available operating system for the Miyoo Mini Plus right now. It has the best community support, and it's feature Rich. I'm showing off what the end state looks like on screen right now to give you an idea of what to expect. There's many different themes as well. If you don't prefer the stock on Unos as always before, you need to have a branded SD card and a branded SD card reader.

Don't use the stock SD card or reader that it came with throw those out. That includes the ROM card for those that missed my previous videos. They're unbranded low quality and prone to failure both in the ROMs and in the SD cards. Unlike the Anbernic devices, the Miyoo has only one slot for an SD card. So I would highly suggest using a 128 gig SD card as your go-to option. The last thing you need is your Roman bios library. If you just want a big list of games, you can curate them yourself. If you'd like head to the spot I'm showing on screen, it'll be an easy way for you to get set up with a ton of play. Read the instructions and grab the version that matches your SD card size and the artwork that you want.
The artwork, optional as onion OS, has built-in scraping now. But it saves a ton of time. If you have a large library, the folders in the zip are all set up to work with onion OS already. So you can just drag and drop and off you go. When we get to that step just in case, I'll leave a link in the description to what your folder name should be for what. Onion OS needs them to be okay, so you have your SD card, SD card reader, your ROMs and bios files ready to go.

As far as software goes, the only thing we need is Rufus head to the link in the description and download the portable Rufus tool. This is going to help us format our SD card as FAT32, especially if your card is above 32 gigabytes. As other programs have issues with that, so Rufus just avoids issues alright. It is important to turn on your Mew and head to settings about and check your firmware version, if yours isn't like mine and it's 2023.
Then we need to update your firmware to this version first before we can do anything else. Don't skip this step, if it's that firmware. You can safely skip to the next section, while your device is powered off. Download the firmware zip from the website link in the description. It's the sugar sync one extract the zip copy and paste the image file onto the root of your micro SD card. Put the SD card into the powered off Miyoo Mini Plus, and then attach a USB charging cable. Make sure the USB charging cable is not USBC and whatever charger. It's plugged into 5 volt Max in a few seconds. The rocket icon will appear as it's upgrading. Don't remove the charging cable, once you see the charging icon. You're done, and it's safe to remove the charging cable.

Turn the device on and head to check your firmware version, just make sure it's updated to 20230326-2339. And now we can proceed connect your SD card to the PC using the SD card reader. Let's format the card as FAT32 open up Rufus and make sure the device listed is the SD card that you connected should match the drive size. Under boot selection, change it to non-bootable, then checking near the bottom. You can change the volume label to whatever you want, and make sure file system is FAT32 click. You might get some warnings about partitions and erasing data, but don't worry. Just go ahead, and click yes to all of them to get started quickly. It'll format your SD card as FAT32. One weird thing you might get a Windows Defender pop-up about a potential issue with the auto run files.
Don't worry! It's a false positive. But we don't need those files anyway. Head into the SD card drive and delete the auto run files. The SD card is ready. Be super careful here, and pay attention that you aren't downloading one of the Miyoo Mini releases. You can see here. It says not for Plus on this other release. So if you're here in the future, keep an eye out. Grab that zip we just downloaded and move it or cut and paste into the SD card. Extract it here and make sure you have six folders showing at the root of the SD card meaning no onion subfolder. Just the drive and then six folders right away. The six folders are TMP underscore update BIOS Miyoo media retro arch and themes.

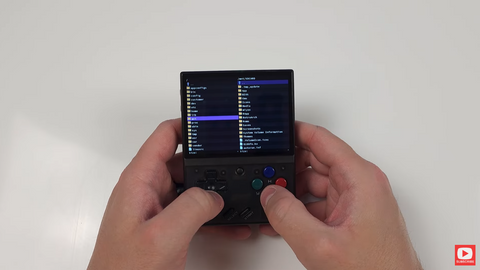
If you don't see all, check your file explorer settings to show hidden files and delete the zip. Now you can safely eject the SD card, pop the SD card into your powered off device and turn it on. Let it do its thing for a few minutes, until the screen pops up with a thank you message and a heart push a to next a few times. We're at the main screen and make note of the hotkeys if you want. As well, it's the menu button and any other button to get the combinations going.
Since we're here on the verified screen, let's go ahead and choose the emulators we're going to be using. So it can add them and create the folders for our ROMs. Just go through the list and select what you'll be using. Don't worry! You can add or remove more later, if you want now for the apps. And these are basically extra programs and features to enhance your device. I chose clock in the video but it's actually not needed. Now that the device has it built in, I'll show that later so.

For ones that you want, I would choose File Explorer, FTP server, game Switcher, HTTP file server, onion OTA update and random game. They're all great choices but don't feel like they're necessary. You can add them later if you want. When you're all done choosing emulators and apps, press the start button. And it'll show a summary of all your choices. Press start again and it'll install them and reboot now.
Before we add ROMs and bios, let's take a quick look at what we installed and did. The first thing I wanted was to brighten the screen and then mute the menu sounds, so changing that for my sanity. I also don't want a sleep timer, so turning that off. Display is where you can change your screen calibration. If you want all right, let's connect to Wi-Fi. It actually took me two tries to get connected, so just be aware it might bug out for you as well. Now that we're connected. Let's browse the apps activity tracker is cool. It'll show your play time for games when we actually play games. Searches your library, and you can spend some time in tweaks but in system.

I'd go into date and time and adjust those settings for Network. I'd enable whatever service you need. For me, it's HTTP server and FTP. I'll show what these both look like a little bit later on. They're very helpful for user interface. I'd enable the recent option that's about it for tweaks. I'd do heading back into the apps menu. You can see the retro arch here. If you want to make any configuration changes to it, there is one change I'd recommend. That's enabling retro achievements so with retro arch open head to settings achievements and entering your username and password. If you don't have a retro achievements account, you can create one at retroachievements.org.
Once you've put in your username and password, press B twice to get to the retro arch main menu, select configuration file and save current configuration. Press B to back out and quit retro arch. let's test it! if I open Advanced Wars, you'll see the game couldn't be identified. The main reason for that is you have the wrong ROM file that matches what retro achievements wants. Usually you grabbed a revision one or two, and it wants the no revision version. For example, if I jump into Breath of Fire for SNES, you can see it says here. That I have 0 out of 63 achievements unlocked, and so it works. I'll learn achievements for this game. You must have Wi-Fi on while playing to earn achievements. Offline progress does not count back to apps. You also find package manager here, which if you remember from before this is where you can make changes to the emulators installed.
Add more remove them or add or remove apps as well. There's more even an expert tab if you want to fool around with some experimental things file explorer. Let’s browse the internal files on the device and make changes FTP server, which after opening will open up your device to allow FTP connections for this. Username is root password, is blank as in nothing game switcher and is pretty cool allowing you to jump between games really quickly.
Again, if we had played some games you'd see them here but I'll show a little bit later on. What this looks like web file browser is a great one as well. If you open up a web browser on your local network and put in that IP address, you'll get an awesome web-based file explorer to add and remove files and folders. This is exactly the functionality. I want a device like this to avoid removing the SD card to add games or make changes. For this username and password are both admin onion OTA update now gives updates over Wi-Fi. So you don't actually need to move manual files anymore and lastly random game which as you guessed.

Let's finally add our ROMs and bios files. Turn off the device, pop out the SD card and connect it back to your PC. This is very easy if you grab the tiny best set I showed earlier. All the folders are already named correctly. So as long as you installed the right emulator with package manager, it'll show on the device. Just copy and paste your ROM folders into the ROMs directory.
99 out of 100 mistakes made are people not doing the step correctly. Make sure that the folder name is correct and inside the platform folder is the files, not more folders. So if I go into GBA folder, I see my games and not more folders for bios. It's the exact same copy. Your bios files into the BIOS folder. No subfolders so for a Playstation 1 bios, which is required for PS1. You would copy that bin file right into the BIOS folder, and that's it once you've loaded. Everything up, safely eject your card and pop it right back into the device.
Mine has been pretty good about recognizing everything immediately. But if not press select on, the games tab in the main menu to refresh your ROMs alright now. Let's get some thumbnails and thank God for Wi-Fi, because if not I'd have to show you how to use the scraper program all over again. I'll start with Game Boy press the Y button and scroll down to scraper. You're going to see four options. You can scrape the entire game boy list just this game configuration or exit.

Let's head to configuration. If we check the sources, you'll see three options. Just leave them checked. I'd suggest this next step, especially if you have a large library but make a screen scraper.fr account. Here, press the x button to bring up a keyboard. Keyboard is a loose definition. As it really is a test of your patience, even Gandhi would lose his mind with this thing. let me save you the trouble if you make a mistake. Don't bother trying to delete the letter. Push X to close the keyboard and then B to exit and then come back in and try again until you get it perfectly. I was losing my mind doing this and seeing it again while editing. I'm getting heavy PTSD once you finally enter your username and password perfectly. Push A on the back to configuration menu. There's an option here to enable background scraping and I would highly suggest that scraping takes forever, and you'll want to do other things while it's going on just be aware it does tax the CPU a bit .
So some games will run slower while it's happening. Head back to the main menu and scrape all Game Boy ROMs. Just to show you what it looks like. Here's the screen without background scraping enabled. And so when that's done you'll see thumbnails pop up on the right side of your games list. Repeat this process for each platform and you have the last thing. I'll show off is themes you can jump right back and forth between different themes installed on the device, and find one you like.

It's a great way to customize the device a bit further. There's also a lot more options in the wiki. The last thing I want to cover is how the power and menu buttons work. If you tap the power button, it puts the device into sleep mode which is basically just disabling the buttons and turning off the screen. It doesn't put it into a low power state, so your battery will drain in this mode. But if you hold the power button, you'll get a pop-up that it says saving your state and shutting down. If you push and hold the power button to turn it back on, you're right back into your game from that state.
So use sleep mode for short periods and power off for everything else for the menu button. If you have game switcher installed, we did before a single press of the menu button. Saves your state and opens game switcher to easily move around to other games. If you push select on the screen, you can also see your time played in that game at the top. If you hold the menu button instead it'll save State and take you back to the menu, instead now just jump into some games and have fun for normal usage. That's all you need to do and that was the main poin